3/23/14

Baked Egg Cups Recipe


We’ve been trying to make some transformations here in our household.  As always, we’re trying to teach the child the value and importance of a healthy diet. In doing so, we’re trying to slowly morph her diet into one that more closely mimics our own.  Or, at least, something a little closer to real food than the sugary breakfast cereals she usually enjoys and the frankenfoods the school calls lunch. This has been a transformation long in the making, and it has had many challenges.  

One of the last junky things to go is her breakfast cereal.  Although we do buy the stuff from the health food section without HFCS, sugar cereal is still sugar cereal.  I want something that will keep her going up until lunch time at school, but finding something quick and nutritious to prepare in the mornings has had me stumped.  Until I discovered egg cups, which are quick, easy, affordable, AND nutritious. They can also be easily customized, which is always a good thing.  

You'll need:
  • 1 dozen eggs (1 egg per cup)
  • 6 oz. filler (meat, veggies, cheese, etc., 1/2 oz. per cup)
  • liquid (milk, bone broth, water, etc.)
  • 2 tbsp. herbs & spices 


To start off, preheat your oven to 325 F.  Then grab your muffin pan and plop a little dab of butter into each cup.  Then slide the pan into the preheating oven for a short time, just long enough to melt the butter.  When the butter is melted, remove the pan from the oven and rub the melted butter around each cup until well coated.

Warning Note: My pan is nonstick, so if yours is not, you might want to run to the store real quick and grab some of those foil muffin liners, then do the butter melting in the liners so they peel off nice and neat. Even with my nonstick pan, this still sticks slightly, so if you don't have a nonstick pan, the results may be disastrous. 

Next, mix up your eggs, liquid (I used milk), and spices, and pour evenly into each cup.  Then sprinkle in your fillers.  For these I used bacon, colby jack, basil, and salt & pepper.  Roughly 1/4 oz. each of cheese and bacon per cup.  


Now, you can go about baking these the safe and clean way, by lining a sheet pan with foil and placing it under the muffin pan while baking. You know, in case they decide to puff over and ooze all over your lovely, clean oven. Or you could live on the edge and just throw 'em in. 

Bake them for about 20-30 minutes, or until a toothpick comes out clean.  Depending on your choice and quantity of fillers, they could take a bit longer. 

You'll end up with something resembling this:


Let them cool for a few minutes.  They might deflate slightly.  That's normal.  Take a butter knife or something and slide it around the egg to release it from the pan, then carefully plop them out.  They won't be perfect, but they shouldn't stick too badly. 

You can keep them refrigerated (if you'll eat them within the week), or freeze for future use.  If you use a microwave, they can be reheated that way, or using a toaster oven.  I haven't personally heated them up using a toaster oven, but I'd imagine running through the toast cycle on medium heat once or twice would do the trick. 

I serve two of them with 1/2 banana for breakfast, which is about 450 total calories. Keep in mind that if you use different fillers, the calories will change significantly.  We find that the child does best (cognitively and physically) with close to 2000 calories daily, so this is a nice start to the day for her.   

Enjoy :)


11/9/13

Curly Girl Update - 11/9/13

Hello, fellow curlies!  I've been having a run of pretty decent hair days lately, so I wanted to update you all.  I'm not currently using the products I mentioned in my last update.  AT. ALL.  Nope, I have a completely new line-up that I'm totally in love with.  I discovered the best conditioner on the planet. (Let's hope this doesn't jinx me... *knocks on wood*)

For those of you with short attention spans, here's a quick rundown of my routine.  If you want the product details, you'll have to keep on keepin' on.

  • Cleansing: use a shampoo bar every few days, and co-washing in between
  • Conditioner: use a combo of the two conditioners mentioned below, either every other day switching, or use both at the same time. Whichever feels right at the time. I rinse everything out completely. 
  • Leave-in:  apply a small amount of my leave-in until my hair feels slippery
  • Gel:  scrunch in some Alba Botanica Strong Hold Gel
  • Drying:  Scrunch with a flour sack towel, then blow dry with a diffuser


Still with me?  Ok, here are the fun details...

I was browsing Vitacost.com (btw, if you shop at vitacost through that link, we each get $10 off a purchse of $30!) and found a couple new conditioners I was interested in trying.  I was having a tough time narrowing it down, but after tedious ingredient scrutiny, I decided on Acure Organics Argan Stem Cell Conditioner and Avalon Organics Biotin B Complex Conditioner.  (Ingredient lists for both are posted at the end, if you're interested)

1: the conditioner

I decided on the Avalon because of the biotin.  Biotin is a B vitamin which is required for healthy hair, skin, nails, eyes, and liver. Since our hair, skin, and nails are the last to receive nutrients, it's fairly important to get some of this via conditioner for your hair.  It's also something I rarely see in the conditioners I've been using, so I thought I'd give it a try in an attempt to battle the brittle ends I've been experiencing. It also has aloe as the first ingredient, which I know my hair loves (although not always in conditioner), followed by a ton of fun oils.

I decided on the Acure Organics because of the argan oil, and the fact that it uses argan stem stem cells. I hear people raving about argan oil all the time, and have yet to try it. A few other ingredients of interest were the glycerin, protein, panthenol, and a few oils and butters. My hair doesn't like glycerin in large quantities, but when it's the ninth ingredient down, it's usually escaped hair-rebellion territory and entered the welcome-slip zone. Usually.  I also don't tend to like butters so much, but this was also very (very) low on the list.

2: the shampoo

The third new addition to my routine is a shampoo bar.  I'm not sure if I mentioned this, but I was having a lot of trouble with limp roots when I was using the lower quality conditioners as co-washes (Suave, Tressemme, etc.). I was sort of in the midst of a hair crisis when I realized that the only thing, pretty much, that I hadn't tried was a shampoo bar. I had heard a lot of curlies talking about how they start off working, but eventually kill your hair, and blah blah blah.  But I also heard a lot of low-porosity curlies talking about how much they LOVE their shampoo bars. So I tried it. And I loved it. I'm still not 100% sure that I am going to stick with THIS shampoo bar, but I will continue using shampoo bars. (Currently I'm using a Nettle, Mint, and Goat Milk Bar from The Northwoods Goat on Etsy.)  I'm using this every other, or every third day.  In between I'm using Yes to Cucumbers as a co-wash.  I never liked it as a full on conditioner, but as a co-wash I'm really fond of it. Most of my products are unscented, so my hair rarely smells like anything, but this has a pleasant scent that lingers and keeps my hair smelling fresh on those in between days.

3: the leave-in

The fourth and final new addition to my routine is a leave-in conditioner. I was looking for something to mimic the Infusium-23 stuff I used to use before going silicone/sulfate free. I found something by a company I had never heard of before. Innersense Organic makes a lightweight leave-in called Sweet Spirit. It comes with a spritzer cap, so I thought it would be liquid. It's thicker than I expected, almost the consistency of a lightweight conditioner.  I think the spritzer cap keeps me from overdoing it, so I don't end up a looking like an oil factory.  In fact, once dry, my hair is nice and soft, not oily at all.  I'm super in love with this stuff. At least for summer use, anyway. We'll see how it stands up to Pennsylvania winters.

So, that's that.  This has been working for me for months now, so I have high hopes for it. I might have to switch it up and go back to using the Alba Styling Cream instead of gel. But I think this routine is pretty solid.

If you've ever used any of these products or have any shampoo bar recommendations, let me know in the comments section!


Happy Hair Days :)


Avalon Organics Ingredients: Aloe barbadensis leaf juice(1), aqua (water), decyl glucoside, sodium coco-sulfate, coco-glucoside, sorbitol, xanthan gum, avena sativa (oat) kernel extract(1)*, calendula officinalis flower extract(1), chamomilla recutita (matricaria) flower extract91), citrus aurantium bergamia (bergamot) fruit extract, daucus carota sativa (carrot) root extract(1)*, persea gratissima (avocado) fruit extract(1)*, rubus idaeus (raspberry) fruit extract91)*, serenoa serrulata fruit extract(1)(2), solanum lycopersicum (tomato) fruit/leaf/stem extract(1)*, styrax benzoin resin extract, tanacetum vulgare extract, canarium luzonicum gum nonvolatiles, cedrus deodara wood oil, cedrus atlantica bark oil, citrus aurantifolia (lime) oil, citrus aurantium dulcis (orange) peel oil, citrus grandis (grapefruit) peel oil, citrus limon (lemon) peel oil, copaifera officinalis (balsam copaiba) resin, coriandrum sativum oil, copaifera officinalis (balsam copaiba) resin, coriandrum sativum (coriander) fruit oil, eucalyptus citriodora oil, eucalyptus globulus leaf oil, ferula galbaniflua (galbanum) resin oil, geranium maculatum oil, helianthus annuus (sunflower) seed oil(1), lavandula angustifolia (lavendr) oil, mentha piperita (peppermint) oil, pogostemon cablin (patchouli) oil, rosmarinus officinalis (rosemary) leaf oil, simmondsia chinensis (jojoba) seed oil(1), zingiber officinale (ginger) root oil, babassu oil polyglyceryl-4esters, bisabolol, citric acid, hydrolyzed wheat protein, inulin(1), sodium sulfate, tocopheryl acetate, alcohol(1), benzyl alcohol, potassium sorbate, sodium benzoate, limonene, linalool.1) Certified Organic Ingredient2) Saw Palmetto Extract*Known as Biotin carrier.


Acure Organics Ingredients: Organic euterpe oleracea (acai) berry, organic rubus fruticosus (blackberry), organic rosa canina (rosehips), organic punica granatum (pomegranate), organic fair trade certified rooibos, cetearyl alcohol, behentrimonium chloride, stearylkonium chloride, vegetable glycerin, glucono delta lactone (fermented sugar), organic argania spinosa (argan) oil, cetearyl glucoside (from corn and glucose), guar hydroxypropyltrimonium chloride (guar gum conditioner), glyceryl stearate (vegetable-derived), L-arginine (amino acid), organic fair trade certified theobroma cacao (cocoa) seed butter, sorbitan olivate (from olives + sugar), panthenol (pro-vitamin B5), cellulose (plant derived), d-alpha tocopherol acetate (vitamin E), lactic acid (vegetable derived), hippophae rhamnoides (sea buckthorn) seed oil, organic curcubita pepo (pumpkin) seed oil, ubiquinone (CoQ10), argania spinosa (argan) stem cells, glycerophosphoinositol lysine (from sunflower), prunus dulcis (almond) extract, cinnamomum aromaticum (cassia bark) oil.

Yes to Cucumbers Ingredients: Water, (aqua), cetearyl alcohol, behentrimonium chloride, cetyl esters, passiflora edulis seed oil, cucumis sativus (cucumber) fruit extract, camillia sinensis leaf extract, aloe barbadensis leaf juice, spinacial oleracea (spinach) leaf extract, prunus armeniaca (apricot) fruit extract, glycoproteins, guar gydroxypropyltrimonium chloride, glycerin, fragrance (parfum), trimethylolpropane tricaprylate/tricaprate, potassium benzoate, citric acid, potassium sorbate, phenoxyethanol.

5/9/13

Meatball Recipe

It seems I spend every waking minute of my life in the kitchen.  I usually spend my weekend prepping our lunches for the upcoming week and cooking big elaborate meals which I don't have time for on weekdays.  My boyfriend and I usually pack soup and fresh veggie juice for lunch.  Last weekend I made pasta fagioli as our "soup of the week."  One of the meats in this soup is meatballs, so I decided to share my recipe for meatballs!

Look at those tasty meatballs swimming in that fagioli!


What you're gonna need:

large chunk of bread
2 lbs ground meat
2 eggs
2 cloves chopped garlic
1 tbsp chipotle pepper powder
1 tbsp smoked paprika
1 tsp onion powder
1 tsp oregano
1 tsp parsley
2 tsp salt
black pepper to taste


Here we go.  Start off with a large chunk of bread (the size of your hand...ish).  Now get it soaking wet.  Yes, that's right.  We need wet bread.  Nice, soggy, dripping wet bread.  Whatever bread you have on hand will probably work, but I usually use a chunk from a fresh loaf of Italian or ciabatta.  Hold it up over the sink until it stops dripping, then squeeze out a little bit of the excess.  Now crumble that into a bowl until you have a pile of what looks like soggy bread crumbs.  I don't ever measure anything, but I suppose if you wanted to be really precise, this pile might be something like 1 heaping cup.

Now throw in your two pounds of ground meat, eggs, and spices.  I like to use 1 lb ground turkey thighs and 1 lb ground beef chuck roast.  Mash everything together.  Yay.  Squishy burger goo.  You're probably wondering why there are two pics of my squishy burger goo.  I forgot some stuff the in the first pic...and I decided to add more chipotle and paprika.  Things rarely go smoothly in my kitchen. Don't judge me.


Roll this squishy burger goo into little balls.  I like them to be this size...


Now place them on a lined baking pan.  Well, really, who am I to tell you what to do.  Line it or don't, but I highly recommend you do.  


Turn your oven on to the broil setting and put a rack in the top slot.  Slide the baking sheet of balls in, and broil those suckers for about 10 minutes.  When they're nice and golden brown and sizzly, take them out and flip them...or do whatever you can that's as close to flipping as possible.  These guys don't really like to flip.  They are balls, after all.


Then cook them for another 10 minutes or so, or until the other side is nice and golden brown and sizzly.  Then slice open one of the larger balls and make sure it's not pink inside.  If there are any signs of pinkness, throw them back in for a few more minutes.  Rinse and repeat until no more pinkness.  But, don't really rinse.  These are meatballs, and that's just a saying...


Now eat these delicious suckers!

What's your favorite way to eat meatballs??  I need some ideas!  I have extra and I'm not a big fan of meatball subs...

5/4/13

Paleo, Raw, or Gluten-Free?


I've been making a lot of changes to my diet lately. My journey into a healthy lifestyle of self-healing started out being very confusing and overwhelming.  Now I find myself almost back where I started years ago, but with a few tweaks.  Let me explain.  

RAW

I started my healing journey by converting to a mostly raw diet, which worked for me for quite a while, although I had cooked meats sometimes with dinner.  I was going whole hog with it.  Green smoothies for breakfast, fruits and veggie snacks throughout the day, a gigantic salad for lunch, raw dehydrator crackers and snacks, then another green smoothie for dinner, or whatever I was cooking for my family.  This was great for a while, but I was super bloated by the end of most days (I think I was eating too much fruit), and I was craving a lot of meat and soup.  

JUICING

To combat the being bloated thing, I bought a juicer and started mixing up fresh veggie juices.  Somehow, I was on an almost completely liquid diet before I knew it.  I was drinking almost 48 oz of fresh juice per day, then coming home and eating a cooked meal for dinner, which consisted mainly of meat and veg, maybe some rice.  As crazy as it might sound, this was actually very satisfying.  I would snack on some nuts in between juices to keep me satisfied, but the juice was surprisingly filling.  Eventually, my boyfriend hopped on my juicing bandwagon, and I had to reduce my juice intake.  The grocery budget demanded it.  We simply could not afford the vegetables it was taking to produce 48 oz of juice per day for 2 people.  That's like $100+ just for juicing veggies per week.  Sorry Charlie, we just can't afford that.  

To compromise, I started making about 16-32 oz of juice for each of us per day, and taking soup for lunch, and nuts and fruit for snacks.  This was working well.  I was also by this time, unintentionally, not eating many grains.  I was pretty much not eating any processed foods, except for the occasional slices of bread for a sandwich here and there.  By "here and there" I mean something like 1 sandwich per week, usually eaten for lunch at the farmers market on the go while shopping with the fam.  

MEAT

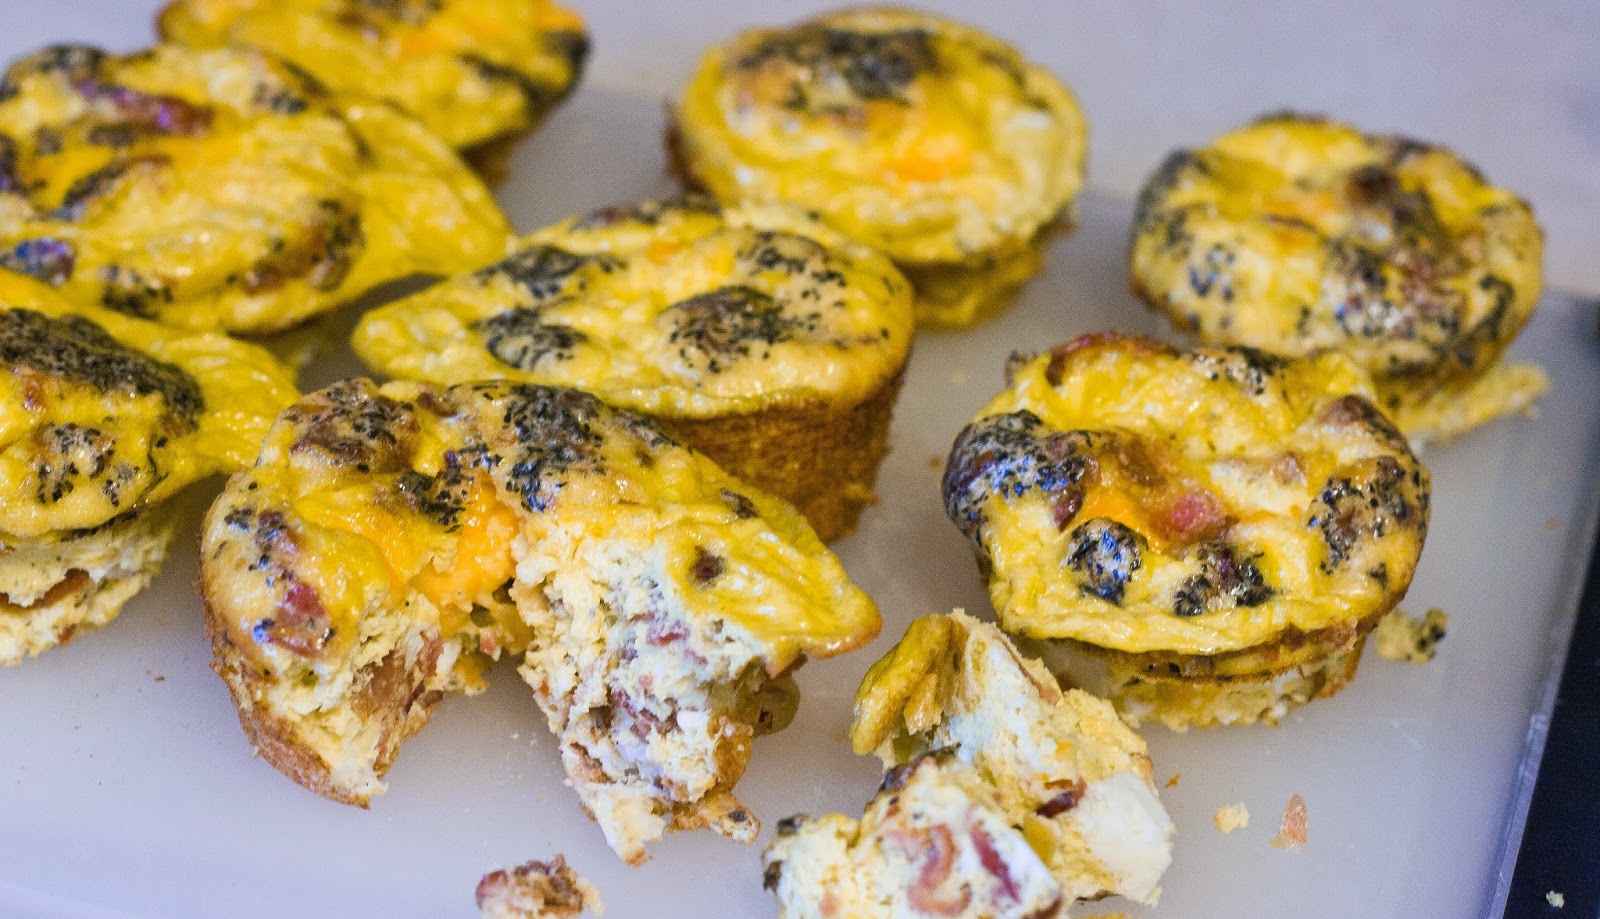
I was eating plenty of meat at this time, as well.  Lots of meat in my lunch soups, and plenty of meat with our dinners.  I had stopped buying CAFO meats from the grocery store and started buying healthy local meats from the farmers markets.  Yes, this is like 3x as expensive as meat from the grocery store, but trust me, it's totally worth it...flavor and quality-wise.  And, as and added bonus, it's way more environmentally friendly!  No more styrofoam trays!  Yay!  

By this time, I was feeling GREAT.  Very little endometriosis related pain to speak of.  I'm sure it was everything (juicing, avoiding processed foods and sugars, healthy meats, raw foods, etc...), but for some reason at the time I attributed it mostly to the grain-free (which translated into gluten free, in my mind) eating habits I had recently acquired.  So I started avoiding gluten.  

CURRENT

Jump to last week, I was in a rush for breakfast foods because I didn't have time to juice, so I raid the cabinets, find some KIND granola and decide this will be a suitable, well rounded breakfast, paired with a banana and some raw milk.  After all, the child eats cereal every day for breakfast and she doesn't explode, so I figure I'll live.  

I get to work, figuring this day will be a misery of throbbing pelvis and cramped back... but no.  No pain to speak of for the entire day.  Hmmm...mysterious.  So I repeat the next day.  Same thing, no pain.  Super.  Repeat all week long...and I'm still feeling great.  I'm convinced it's the raw milk, but now I'm also convinced that I'm not as gluten sensitive as I had once thought.  But then again, perhaps 1 cup of "healthy" grains (not to quote the KIND slogan) per day isn't so bad.  *scratches head in confusion* 


CONCLUSION

To sum it all up, basically, I really don't know what the hell I am doing with my diet anymore.  I know I'm more discriminative about what I bring into my house to feed my family.  Although I thought I was healthy before, I feel completely different about "health food" now.  I look at food through a completely different lens now.

I thought I was raw/vegan, then I thought I was paleo, then I thought I was gluten free.  Then I realized I was some strange hybrid of all three.  I picked from each what worked for me, because honestly, I don't really think any of those things are for me.  At least not 100%.  I do look for paleo friendly recipes because I know that they are going to contain foods and ingredients that I'm actually comfortable feeding myself and my family.  I do cook my veggies with dinner (I know I'm killing the enzymes and I don't care).  I do not strictly adhere to any one diet.  I do what feels right and makes me feel good. Right now, eating the way I do, I feel great and effortlessly maintain a healthy body weight without counting calories or nutrition facts.  I've done a lot of research, read a lot of books, and studied nutrition endlessly for months on end.  After reading the China Study years ago, I was convinced meat caused cancer.  Maybe it does, maybe it doesn't.  I know that I've read a lot on both sides of the meat debate and many other controversial dietary issues, and I'm now comfortable with my dietary choices, eating meat included.

Currently, I:

  • avoid processed junk
  • am careful with my omega 3/omega 6 ratio balancing
  • eat healthy, local meat
  • make bone broth
  • am eating more fresh vegetables than ever (through juicing and with dinner and snacks)
  • eat very little fruit (except in green smoothies)
  • eat tons of saturated fats and do NOT avoid cholesterol
  • avoid soy
  • eat sugar sparingly

Whatever you want to call that, I call it a healthy diet which makes me feel great.  

3/31/13

Curly Girl Update - March 2013

Anyone else out there having wacky unpredictable hair days lately?  Maybe it's the crazy weather here in Pennsylvania.  Warm one day, snowing the next.  The world may never know.

My hair days lately have been ranging from mildly acceptable to completely shitty.  From one day to the next, with the same exact products, my results have been completely unpredictable.  I have no idea what the H-E-Double-Hockey-Sticks is going on in Heather's Hair Land.  

I've been using my same old products, in various combinations.  Nothing's really working for me. 


My current products

Kinky Curly Curling Custard (KCCC)
La Bella Super Hold + Ultra Shine
Biotera Styling Curl Creme
Lily of the Valley Aloe Gel


How I've been using them

Biotera as leave-in + La Bella Gel: Works sometimes, not others; very unpredictable combination

Biotera as leave-in + KCCC + La Bella Gel: Too crunchy and stringy

Biotera as leave-in + KCCC + Aloe + La Bella Gel: Decent results at times, but unpredictable

KCCC + Aloe + La Bella Gel: Better results than when using Biotera first, but still nothing to write home about


The verdict

The aloe definitely helps, regardless of what it's used with.  I've mentioned that before, and it seems to be holding true.  KCCC has it's days, but it seems to depend on what it's used with and how much of it I use. Four pea size globs seems to be the max amount of KCCC my hair will tolerate before betraying me.  I seem to need a firm hold gel, but La Bella doesn't seem to be the one for me. I had a gigantic tub of it, and I felt the need to exhaust the supply before buying something new.  Now that that's finally gone, I decided it's high time to shop around.     


In my hunt for a new gel, I read something in the CurlTalk forums about someone using coconut oil with their KCCC, then topping it off with strong hold gel.  Well, as we all know, I love coconut oil for almost all things...so needless to say I gave this a try!  I used equal amounts of KCCC + coconut oil emulsified in my palms then raked through, followed by a small amount of La Bella Gel.  I actually liked it quite a bit, although I don't want to jump the gun.  My hair was well defined, and soft, although it looked a little stringy until I scrunched it and puffed my roots.  Surprisingly, it didn't feel oily at all, which really surprised me as I'm usually SUPER easily weighed down by oils.  

I will continue to play with this combination, but as we can see, my results tend not to be consistent.  Only time will tell.  

In the meantime, I ordered some Alba Botanica products.  I read in the forums some people having really good results with their products.  Some people like the curl creme, some the gel, some the leave-in.  So I ordered all three :)  

*Fingers Crossed* that one of them works for me!  

3/19/13

How-To: Matting Your Own Art

I recently picked up some prints from a seller on Etsy.  I love the prints, but they were an unusual size.  I couldn't find any frames that fit them nicely, and I wasn't prepared to pay for custom framing.  So, as usual, I went the DIY route for framing and matting.  I'm pretty pleased with the results...


I picked up the supplies for this project for less than $40 total.  That was due in large part to the sale at the craft store.  My frames were marked down from $21.99 to $7.99!  Ummm, yes please!  The poster board ran me about $6.  Other than that, I had all the supplies needed on hand.


To create your own matting, you'll need:

  • frames 
  • poster board
  • art prints
  • pencil
  • X-acto knife
  • Omnigrid ruler
  • self healing mat


First things first, I used these float frames.  They are designed with two panes of glass, instead of one pane of glass and piece of backing.  I chose them by accident, because they were on sale.  But they worked out far better than expected because the matting ended up pressed snugly to the art print between the two panes of glass.  I did matte another set of prints with traditional frames, and the results were not nearly as polished.  The finished product with the float frames looks almost professional...from a distance at least!  When you get up close, you can see there is no depth to the matting, so it doesn't have QUITE the same effect, but damn close!  And I couldn't be happier, especially for just under $40!  


To start off, take the glass out of your frame.  Lay the glass down on top of your poster board.  I lined mine up in one of the corners so I only had to cut two sides.  Less room for user error is always good, imo.  Press down firmly in the center of the glass, and cut around the sides of the glass with your X-acto.  


You should then have a piece of poster board which fits your frame perfectly.  Move the glass and X-acto elsewhere.  Figure out how thick you want your matting borders to be.  If you're not sure, start off THICKER than you think you might want.  That way you will still have room to trim, if necessary. The top and bottom borders don't have to be the same thickness, just as long as it's visually appealing to you!  I made sure my prints were evenly framed by the matting, which ended up looking nicely symmetrical although my matting is thicker on the sides than top/bottom.  

Once you've determined how thick you want the matting, grab your Omnigrid ruler, lay it over the poster board at the desired measurement, and draw a line with your pencil.  Do this with all four sides. Now you have a nice, neat rectangle in the middle which you will be cutting out.  Now realign the Omnigrid with your lines, and use it to trace your pencil markings on each side.  You should end up with something looking like this:


Repeat these steps as many times as necessary for each print you have.

To assemble, lay down one of your glass panes, then lay the matting down on top of the glass, then line your print up on top of the matting (face down), and lay the back pane of glass down on top.  Carefully lift the panes and slide them into the frame.  And viola! You have a matted piece of art!


As I mentioned earlier, I do highly recommend getting the float frames for this project because the end result will be much more polished.  The prints I did with traditional frames were not pressed as tightly to the front pane of glass, and you could see some shadows where gaps formed between the print and the matting.  Nothing major, but I'm a perfectionist and it bothers me.  My boyfriend says he doesn't notice and they look fine.  Whatever.

Any questions?  Feel free to leave them in the comments section!

3/8/13

Juicing, and how to make it last


Yes, it’s been forever since I’ve last posted. No, I’m not going to bore you with how busy I was or what was keeping me from the blog.  What I am going to do is talk about juicing. 

As you might have guessed, I finally got that juicer which I’ve been coveting for some time now.  You know the one.  The Omega J8005.  She’s a beauty. 


You might be wondering why I chose this one over, say, one of the ever-popular Breville’s or the Green Star.  Or you might now be wondering what the heck the Green Star is. 

Okay, okay.  Let me start from the beginning. 

Centrifugal

I started off thinking I would, in fact, get a Breville centrifugal juicer.  The price seemed right, and hey, the Amazon ratings are pretty high, so how bad could it be?  Well, upon further research, I discovered that these centrifugal types are far more prone to oxidation than their masticating counterparts.  This is due to the way in which they work.  What they do, pretty much, is take the vegetables and spin them around and cut them up until the pulp is spun dry.  Then the pulp and juice are separated and ejected through their respective exits.  The problem with this is it’s not quite as efficient as most masticating juicers, which means waste.  If there’s anything in the world that I hate, it’s waste.  Immediately, my mind conjures up images of soggy pulp and wasted juice (and having to buy too much produce, and what that’s going to do to my grocery budget…and before I know it I’m in a full blown panic about going bankrupt.  All over soggy pulp.  My brain is a chaotic place…).  This is all extremely wasteful and I can’t really stomach that much waste (money, and food…and I guess nutrients, so TRIPLE NEGATIVE on these centrifugals), especially when I consider just how much I’m planning to juice.  The added expense over time of the wasted juice is simply not worth saving a few bucks right this second (the centrifugal juicers are typically much more “affordable” than the masticating juicers).  And apparently these suckers can be pur-itty loud.  I don’t know about you, but I have enough appliances trying to murder my ear drums.  I don’t think I need another. 

Masticating

My next logical step, of course, was to begin looking into masticating juicers.  This is where I found the Omega line of juicers.  Also in this category is a brand called Champion.  Some people like them, but in my research I determined the Omega to be better (for my uses), for reasons I am now unable to recall.  Go figure.  The masticating juicers work slower, but juice much more efficiently than the centrifugal types.  I can handle throwing in a few extra minutes of my time if it means higher quality juice, and more of it.  The pulp coming out of my machine (the Omega J8005) is dry as a bone.  The only time it’s at all wet is if I’m pushing too much food through the chute, which means I’m not giving the machine enough time to work its magic on the pulp already in the auger.  If I’m patient, I can’t squeeze a single extra drop of juice from the ejected pulp.  That auger thing I mentioned, that’s the other difference between the two types if juicers.  The masticating juicers work with an auger, which rotates to push and squeeze the juice from the veggies, working the ever-dryer pulp toward the spout, while excreting the (almost) pulp-free juice out the bottom of the compartment.

Others

There are also a few other models to choose from.  The Green Star, mentioned above, is basically the top of the line.  It can’t be beat as far as efficiency and juicing grasses and greens.  It also comes with a $500 price tag, so you get what you pay for here in the juicing realm.  Omega also makes an upright masticating juicer, which is sort of new technology on the juicing scene (or so I was to understand while doing my research).  I don’t really know too much about them, as I didn’t dig too deep into them.  The one I found was almost $400, so when I realized I could get everything I wanted for ~$250, I decided to quit while I was ahead and go with the Omega J8005 before I convinced myself that I did, indeed, need to spend $500 on a juicer. 

Juicing in Action

When I started talking to people about juicing, most people seem to share the opinion that juicing is too expensive.  So far, I beg to differ.  Let me give you a cost example for my most recent batch of juice.  I like a nice combo of cucumber, tomato, carrot, apple, parsley, and ginger.  I made a triple batch over the weekend to last me throughout the week.  Here’s what I used and what I estimate to be the cost of each:

(Keep in mind, it’s currently the dead of winter here in PA, so prices are a little higher than usual)

15 carrots:                           $0.90
4 green apples:                     $2.00
6 tomatoes:                          $5.50
3 large cucumbers:               $3.00
1 handful of parsley:             $0.15
2-3” chunk of ginger:            $0.25
TOTAL                              $11.80

This batch yielded 6 pint sized jars of juice.  For me, that equals 6 days’ worth of juice.  So that is less than $2 per pint of fresh vegetable juice.  I used to spend more than twice that amount on a 12 oz. mocha latte every day, so I count juicing as a bargain, both for my wallet and for my health. 

So it’s official.  I’m a juice convert, for sure.  I love having a fresh glass of juice every morning, ready and waiting in the fridge.  In case you’re wondering how I keep my juice for the entire week, I use my foodsaver with the widemouth jar attachment to “preserve” the juice.  I put preserve in quotes because it’s not technically preserving, since it still requires refrigeration, but this method will keep your juice fresh for at least a week.  A week is the longest I’ve let sealed containers of juice hang around, so I can’t yet speak to the quality of juice contained for longer periods of time.  I will bet that the juice will last longer, though, because I didn’t notice any degradation of flavor at the 6 day mark.  I do highly recommend sealing your juice in mason jars, as it saves a lot of time to prep, juice, and can a weeks’ worth of juice at once, instead of chopping and cleaning 7 days a week. 

Have any juicing know-how of your own to share?