7/6/14

Creamy Shrimp Scampi with Kale & Peas

I love any meal with sauce.  Especially a garlic based sauce.  And I love shrimp.  So scampi is, naturally, a favorite of mine.  I’ve made it many ways over the years and tested out many recipes, but I’ve never been fully satisfied with any of them.  Some have too much lemon; too much oil; not enough garlic; not enough sauce.  None of them are perfect. 

This one might not technically be a scampi.  You might consider it more a shrimp and garlic butter sauce, but it’s the best of everything I’ve come to love of the scampi dishes I’ve tried: Lots of garlic & parsley, a little lemon zing, and loads of shrimp. 

Mine is also swimming in sauce.  I like the sauce to be on the creamy side, so I use milk or cream from time to time. But if you aren’t a saucy person, feel free to omit that entirely. And if you’re paleo, definitely feel free to use bone broth. It will be just as tasty.

The first recipe I ever tried for scampi included paprika, but most don’t.  I found that I like it more with paprika.  I use smoked.  It adds a nice bit of depth. 

And, of course, no meal in my kitchen is complete without veggies.  I like to combine them with the shrimp and sauce, instead of serving on the side.  You know, to spread the saucy love. I usually use whatever veggies I have on hand, or whatever I’m in the mood for.  This time around, I was in the mood for kale and peas.  Feel free to use whatever veggies suite your fancy.  Or none, that’s fine, too.  Weird…but fine.   

I like to serve this over pasta.  I prefer to use quinoa pasta.  Most of them have corn flour as an ingredient, so if you have a corn allergy and are gluten free, you can use quinoa or rice. I’ve been known to serve a lot of traditional pasta dishes over quinoa. If you’re strictly paleo, you can make zucchini pasta or just eat it as-is.  If you’re not serving it over something, however, I would tone it down with the sauce quantity, unless you want to be dining on scampi soup, which, actually, now that I’m thinking about it, doesn’t sound too bad. 

Oh, I forgot to mention, there’s bacon. Delicious, tender, salty, crunchy bacon. Yum.

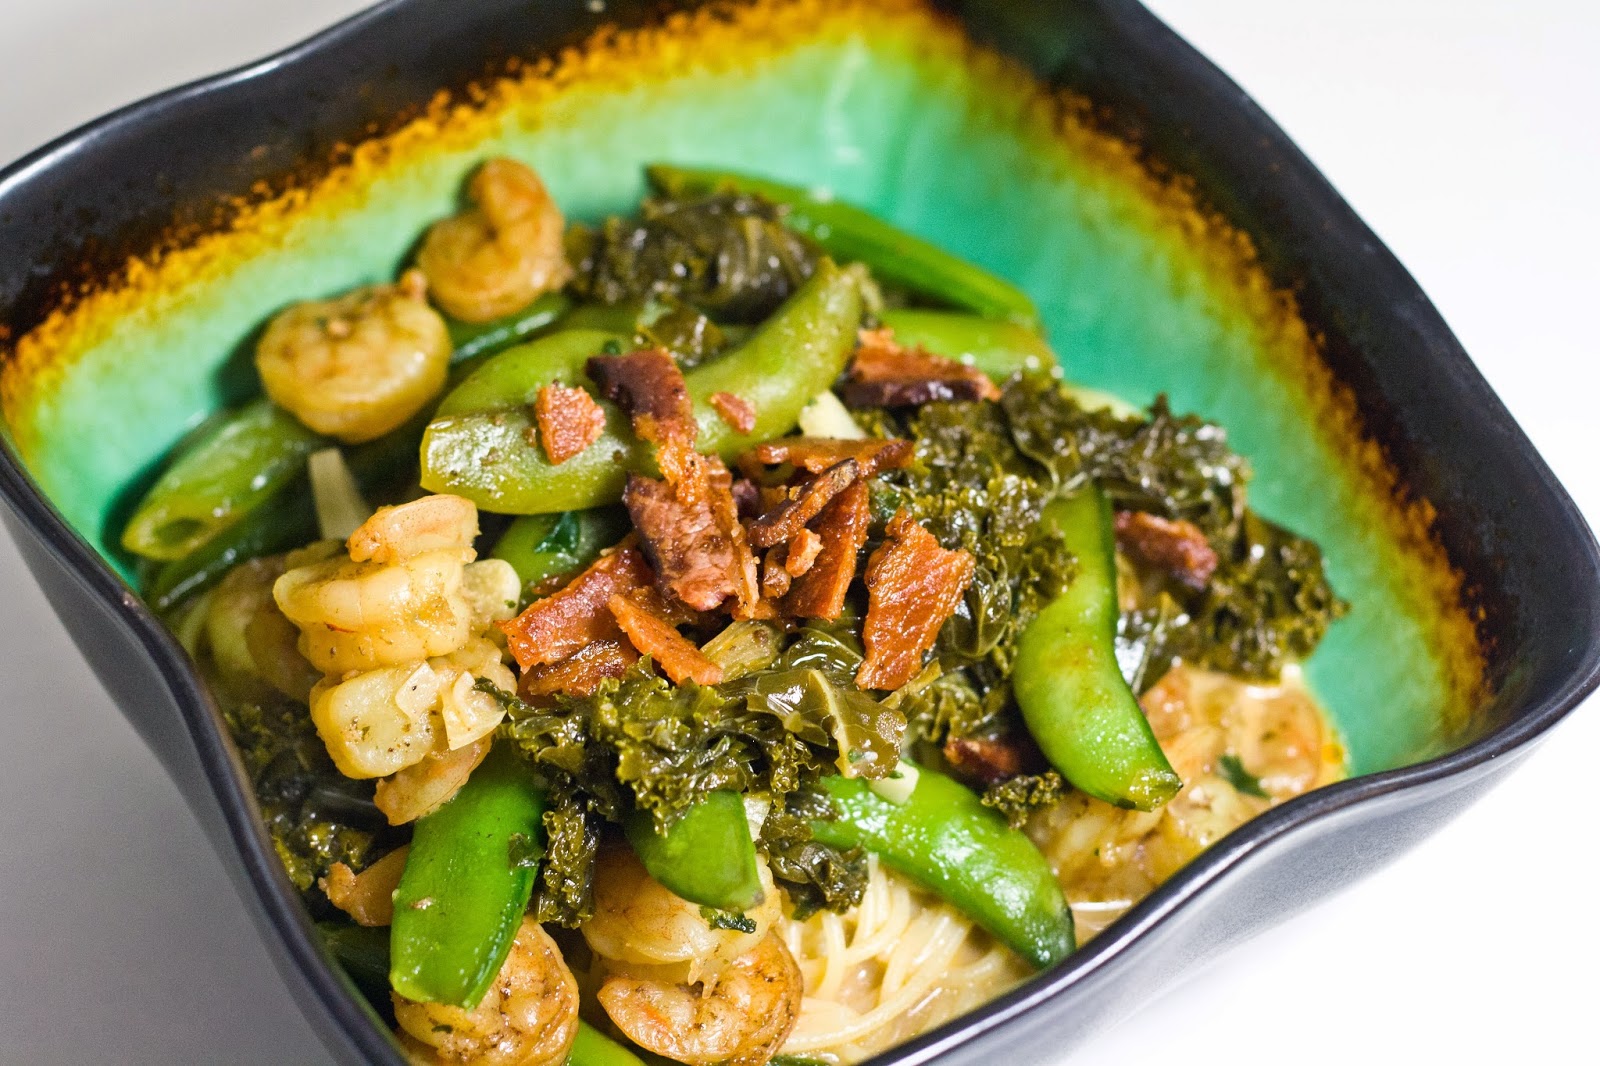
So, here you go.  Creamy Shrimp Scampi, coming right up. 

24 oz shrimp
1 box angel hair
8 oz kale, chopped
16 oz peas
paprika
salt and pepper
juice of 1 lemon
10 garlic cloves, minced
1 tbsp parsley
1/2 - 1 c. milk, cream, or broth
6 slices bacon


Fry bacon in a pan over medium-low heat.  Drain most of the fat, then fry shrimp in pan with a bit of the bacon fat. 

In another pot, cook kale & peas with the lemon juice, paprika, garlic, and parsley for about 15 minutes, or until the kale is tender. 

Transfer shrimp & any accumulated liquid to the veggie pot.  Add cream.  Simmer for a few minutes.

Serve over pasta, topped with bacon crumbles. 

6/30/14

Minty Fennel Green Juice

One thing I hate about juice recipes is that they always call for fruit and veg by the piece.  I find that this yields extremely inconsistent results.  I’m very plan oriented, and I need consistency to plan appropriately.  To combat this, I’ve started documenting the average weights of fruit and veg so that I can use weight in my recipes (or convert those I find to use weight instead).  That way I always get the same amount of juice from a recipe.  And no chaos ensues in my kitchen.  No, that never happens…   

When I buy all of my produce over the weekend, I’ll wash, cut, and bag all of the produce up individually so it’s ready to be weighed and juiced at any time, with limited prep required. I find this saves a lot of time and doesn’t change the quality of the juice or lessen the quantity.  And as much as I hate single use items and plastic bags, I do love using plastic zip top bags to store my produce.  It keeps it all very fresh, and the space they take up shrinks as I use up the produce.  I die a little inside every time I throw one away, but you choose your battles, I suppose. 

I find a lot of great recipes on the rebootwithjoe site, which is where I found this one (don’t ask me where, because I can’t find it now).  It called for handfuls and pieces and stalks, so I converted everything to ounces.  I made a couple substitutions.  I used orange instead of grapefruit, dandelion instead of kale, and I used all parts of my fennel (bulb, stems, and leaves). 

I found this to be extremely refreshing for a green juice.  Usually green juices are…uhh… well… pretty fucking nasty.  This was pleasantly sweet and minty.  I will definitely be adding this to my regular juice rotation. 

Here’s the recipe by weight and by piece, in case you’re a fly-by-the-seat-of-your-pants kind of person. 

6.6 oz. orange (or 1 orange)
1 oz. mint (or 1 handful)
12 oz. celery stalks (or 6 stalks)
10 oz fennel bulb + 6 oz fennel stems/leaves (or 1 bulb fennel with all stalks and leaves)
1 lemon
16 oz. green apple (or 2-3 apples)
4 oz. dandelion greens (or ~1/2 bunch)


yields slightly more than 56 oz.

Cheers to good health!


Wondering about the nutritional value?  Here you go.  Want the TL;DR version?  This juice will give you super healthy blood, brain, bones, & skin, and might even help your vision. 

Dandelion greens give you a shit ton of vitamin K & A, a hefty amount of phosphorus, potassium, & calcium, and trace amounts of vitamin B & C, calcium, magnesium, manganese, and iron.  

Mint contains vitamin C, manganese, and copper.  Mint also aids in digestion and produces something called monoterpene which is said to slow tumor growth and prevent cancer formation in certain areas of the body. It also acts as an antioxidant and has antibacterial properties. 

Oranges, of course, contain vitamin C, but also vitamins A & B, potassium, and calcium. 

Celery contains vitamins A, B, C, K, and tons of minerals and antioxidants.  Celery also contains compounds which might help reduce nervousness and headaches. 

Fennel has quite a bit of potassium and vitamin C, and trace amounts of selenium and other minerals. The stems contain a solid mixture of B-complex vitamins. 

Apples contain B-complex vitamins, vitamin C, and trace amounts of minerals. They also contain quercetin, which acts as a powerful antioxidant. 


6/22/14

Raw Trail Mix Recipe

I love trail mix, don’t you?  Trouble is, I can never find a premade mix at the store that I’m 100% satisfied with.  Usually they contain at least one ingredient that I want nothing to do with. Like peanuts, m & m’s, or yogurt covered raisins.  No thank you.  I’ll make my own!


I’ve been making my own trail mix for a while now.  It’s a must-have on our kayaking trips and now it’s a standby in our lunches for work.  It satisfies on so many levels.  There are the salty-smoky pistachios, the bitter-crunchy cacao nibs, the sweet-chewy cherries, and the variation in texture with almonds, cashews, and sunflower & pumpkin seeds.  

This mix is sure to please every palate.  My boyfriend even likes it, and he used to swear he only liked peanuts.  If you have some picky kids, try adding more dried fruit to up the sweetness factor.  Try banana chips, raisins, strawberries, or apples.  They might find the cacao a little bitter, but I find that the cherries (and other fruit, if you’re adding more) balance out the bitter quite nicely and you end up with a nice jolt of chocolate flavor without most of the bitter edge.  Or maybe I’m just used to raw cacao.  Not sure.  I will say that the resident child requests this in her lunch quite often.

It's jam packed with all kinds of fun nutrients, like vitamin E, magnesium, manganese, potassium, B2, B6, phosphorus, zinc, iron, biotin, selenium, calcium, and even a little vitamin A.  And, of course, tons of healthy fats, fiber, and protein. In addition to some of the vitamins and minerals already mentioned, the cacao nibs also add a few other things, like chromium (which is said to help balance blood sugar), theobromine (antibacterial), and vitamin C. They also contain some fun amino acids and many people even claim they boost serotonin. I’m not quite sure how that works, but I’ll take all the serotonin boosting I can get! 

Anyhow… to make this awesome nutrient-dense trail mix, you’re going to need:


1 c. raw almonds
1 c. raw cashews
1 c. raw pumpkin seeds
1 c. raw sunflower seeds
¾ c. salted, shelled pistachios
¾ c. raw cacao nibs
½ c. dried cherries
½ c. brazil nuts (optional)


I like to add the brazil nuts…you know…to meet my selenium quota, but you can leave them out if you’re not a fan, or if you supplement selenium or whatever.  I don’t supplement selenium because it makes my BO smell like garlic, which I think is rather repulsive. 


Toss it all into a bowl, or a bag and shake it up.  Make sure your cherries aren’t sticking together in big globs, then store the mix in glass jars.  I like to store the mix in wide mouth mason jars and vacuum seal them with the food saver.  But that’s just me.  I seal everything.  

Using the measurements listed, this recipe makes two 32 oz. jars. I consider about ¼ - ½ cup to be a serving. 

Here are some rough nutrition facts.  They're not exact, but pretty close.  Don't pay any attention to the vitamin and mineral content or the servings.  That's not accurate at all.  


3/23/14

Baked Egg Cups Recipe


We’ve been trying to make some transformations here in our household.  As always, we’re trying to teach the child the value and importance of a healthy diet. In doing so, we’re trying to slowly morph her diet into one that more closely mimics our own.  Or, at least, something a little closer to real food than the sugary breakfast cereals she usually enjoys and the frankenfoods the school calls lunch. This has been a transformation long in the making, and it has had many challenges.  

One of the last junky things to go is her breakfast cereal.  Although we do buy the stuff from the health food section without HFCS, sugar cereal is still sugar cereal.  I want something that will keep her going up until lunch time at school, but finding something quick and nutritious to prepare in the mornings has had me stumped.  Until I discovered egg cups, which are quick, easy, affordable, AND nutritious. They can also be easily customized, which is always a good thing.  

You'll need:
  • 1 dozen eggs (1 egg per cup)
  • 6 oz. filler (meat, veggies, cheese, etc., 1/2 oz. per cup)
  • liquid (milk, bone broth, water, etc.)
  • 2 tbsp. herbs & spices 


To start off, preheat your oven to 325 F.  Then grab your muffin pan and plop a little dab of butter into each cup.  Then slide the pan into the preheating oven for a short time, just long enough to melt the butter.  When the butter is melted, remove the pan from the oven and rub the melted butter around each cup until well coated.

Warning Note: My pan is nonstick, so if yours is not, you might want to run to the store real quick and grab some of those foil muffin liners, then do the butter melting in the liners so they peel off nice and neat. Even with my nonstick pan, this still sticks slightly, so if you don't have a nonstick pan, the results may be disastrous. 

Next, mix up your eggs, liquid (I used milk), and spices, and pour evenly into each cup.  Then sprinkle in your fillers.  For these I used bacon, colby jack, basil, and salt & pepper.  Roughly 1/4 oz. each of cheese and bacon per cup.  


Now, you can go about baking these the safe and clean way, by lining a sheet pan with foil and placing it under the muffin pan while baking. You know, in case they decide to puff over and ooze all over your lovely, clean oven. Or you could live on the edge and just throw 'em in. 

Bake them for about 20-30 minutes, or until a toothpick comes out clean.  Depending on your choice and quantity of fillers, they could take a bit longer. 

You'll end up with something resembling this:


Let them cool for a few minutes.  They might deflate slightly.  That's normal.  Take a butter knife or something and slide it around the egg to release it from the pan, then carefully plop them out.  They won't be perfect, but they shouldn't stick too badly. 

You can keep them refrigerated (if you'll eat them within the week), or freeze for future use.  If you use a microwave, they can be reheated that way, or using a toaster oven.  I haven't personally heated them up using a toaster oven, but I'd imagine running through the toast cycle on medium heat once or twice would do the trick. 

I serve two of them with 1/2 banana for breakfast, which is about 450 total calories. Keep in mind that if you use different fillers, the calories will change significantly.  We find that the child does best (cognitively and physically) with close to 2000 calories daily, so this is a nice start to the day for her.   

Enjoy :)