One of the last junky things to go is her breakfast
cereal. Although we do buy the stuff
from the health food section without HFCS, sugar cereal is still sugar
cereal. I want something that will keep her going up until lunch time at school, but finding something quick and nutritious to prepare in the mornings has had
me stumped. Until I
discovered egg cups, which are quick, easy, affordable, AND nutritious. They can also be easily customized, which is always a good thing.
You'll need:
- 1 dozen eggs (1 egg per cup)
- 6 oz. filler (meat, veggies, cheese, etc., 1/2 oz. per cup)
- liquid (milk, bone broth, water, etc.)
- 2 tbsp. herbs & spices
To start off, preheat your oven to 325 F. Then grab your muffin pan and plop a little dab of butter into each cup. Then slide the pan into the preheating oven for a short time, just long enough to melt the butter. When the butter is melted, remove the pan from the oven and rub the melted butter around each cup until well coated.
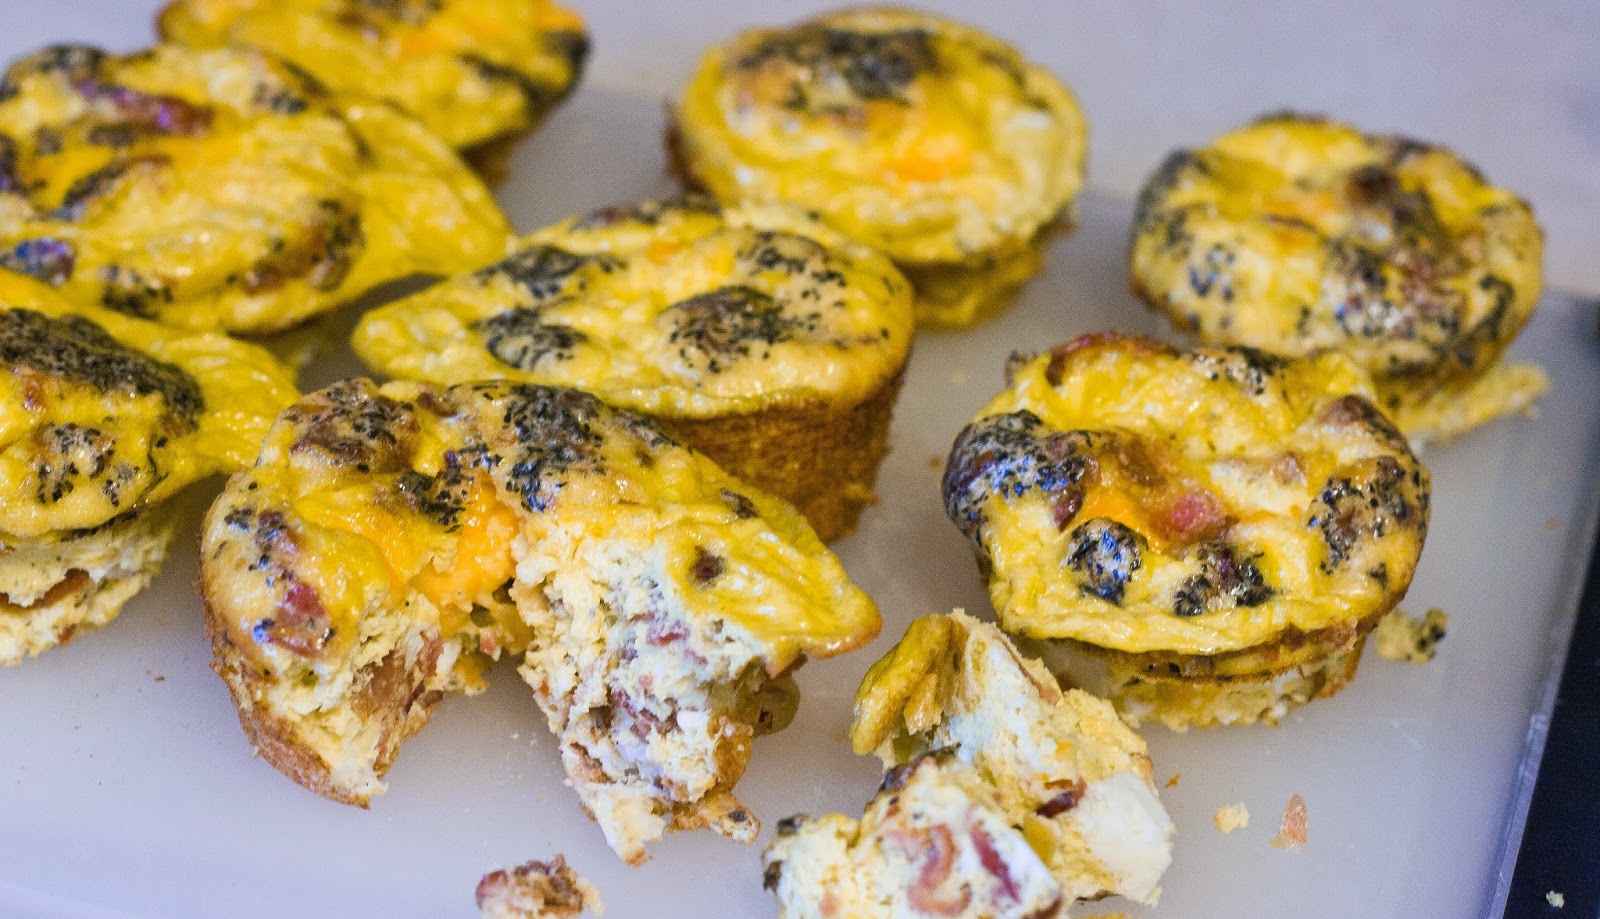
Next, mix up your eggs, liquid (I used milk), and spices, and pour evenly into each cup. Then sprinkle in your fillers. For these I used bacon, colby jack, basil, and salt & pepper. Roughly 1/4 oz. each of cheese and bacon per cup.

Now, you can go about baking these the safe and clean way, by lining a sheet pan with foil and placing it under the muffin pan while baking. You know, in case they decide to puff over and ooze all over your lovely, clean oven. Or you could live on the edge and just throw 'em in.
Bake them for about 20-30 minutes, or until a toothpick comes out clean. Depending on your choice and quantity of fillers, they could take a bit longer.
You'll end up with something resembling this:

Let them cool for a few minutes. They might deflate slightly. That's normal. Take a butter knife or something and slide it around the egg to release it from the pan, then carefully plop them out. They won't be perfect, but they shouldn't stick too badly.
You can keep them refrigerated (if you'll eat them within the week), or freeze for future use. If you use a microwave, they can be reheated that way, or using a toaster oven. I haven't personally heated them up using a toaster oven, but I'd imagine running through the toast cycle on medium heat once or twice would do the trick.
I serve two of them with 1/2 banana for breakfast, which is about 450 total calories. Keep in mind that if you use different fillers, the calories will change significantly. We find that the child does best (cognitively and physically) with close to 2000 calories daily, so this is a nice start to the day for her.
Enjoy :)
No comments:
Post a Comment